Putting your 60HE Module together
So you finally have your awesome new 60HE Module, but you're not entirely sure how to put it all together? Let's get started!
What's in the box
Opening the box and taking everything out, it's easy to get a little overwhelmed. But it's quite simple, once you know everything.
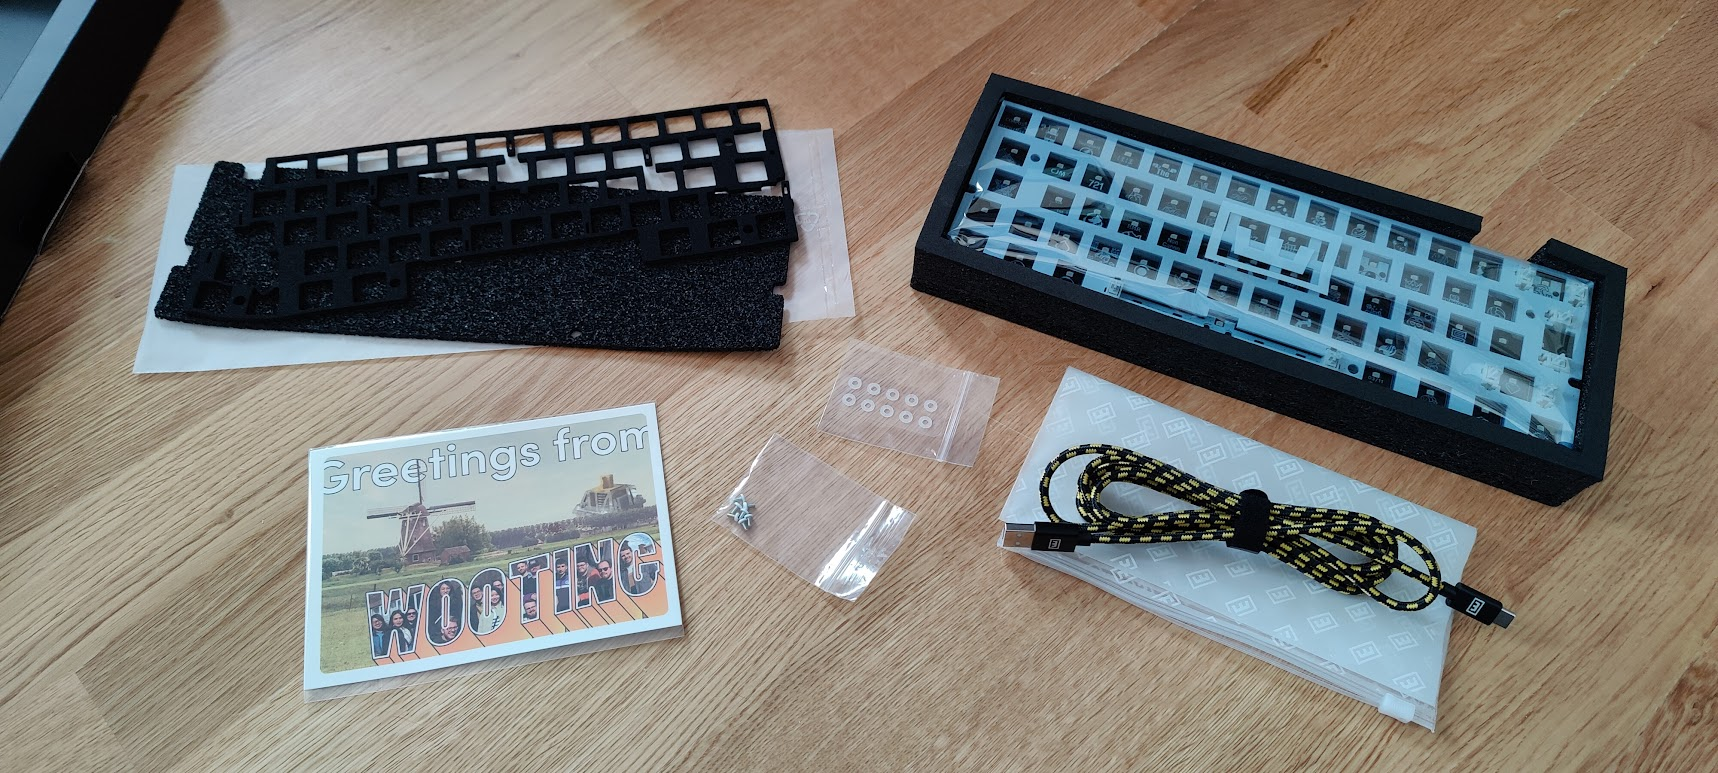
The module
The module itself is preassembled with the PC Plate kit and the silicone inlay piece - This can be swapped for the the black, foam inlay piece instead, depending on your sound profile preference (Which we'll cover further down in this article)
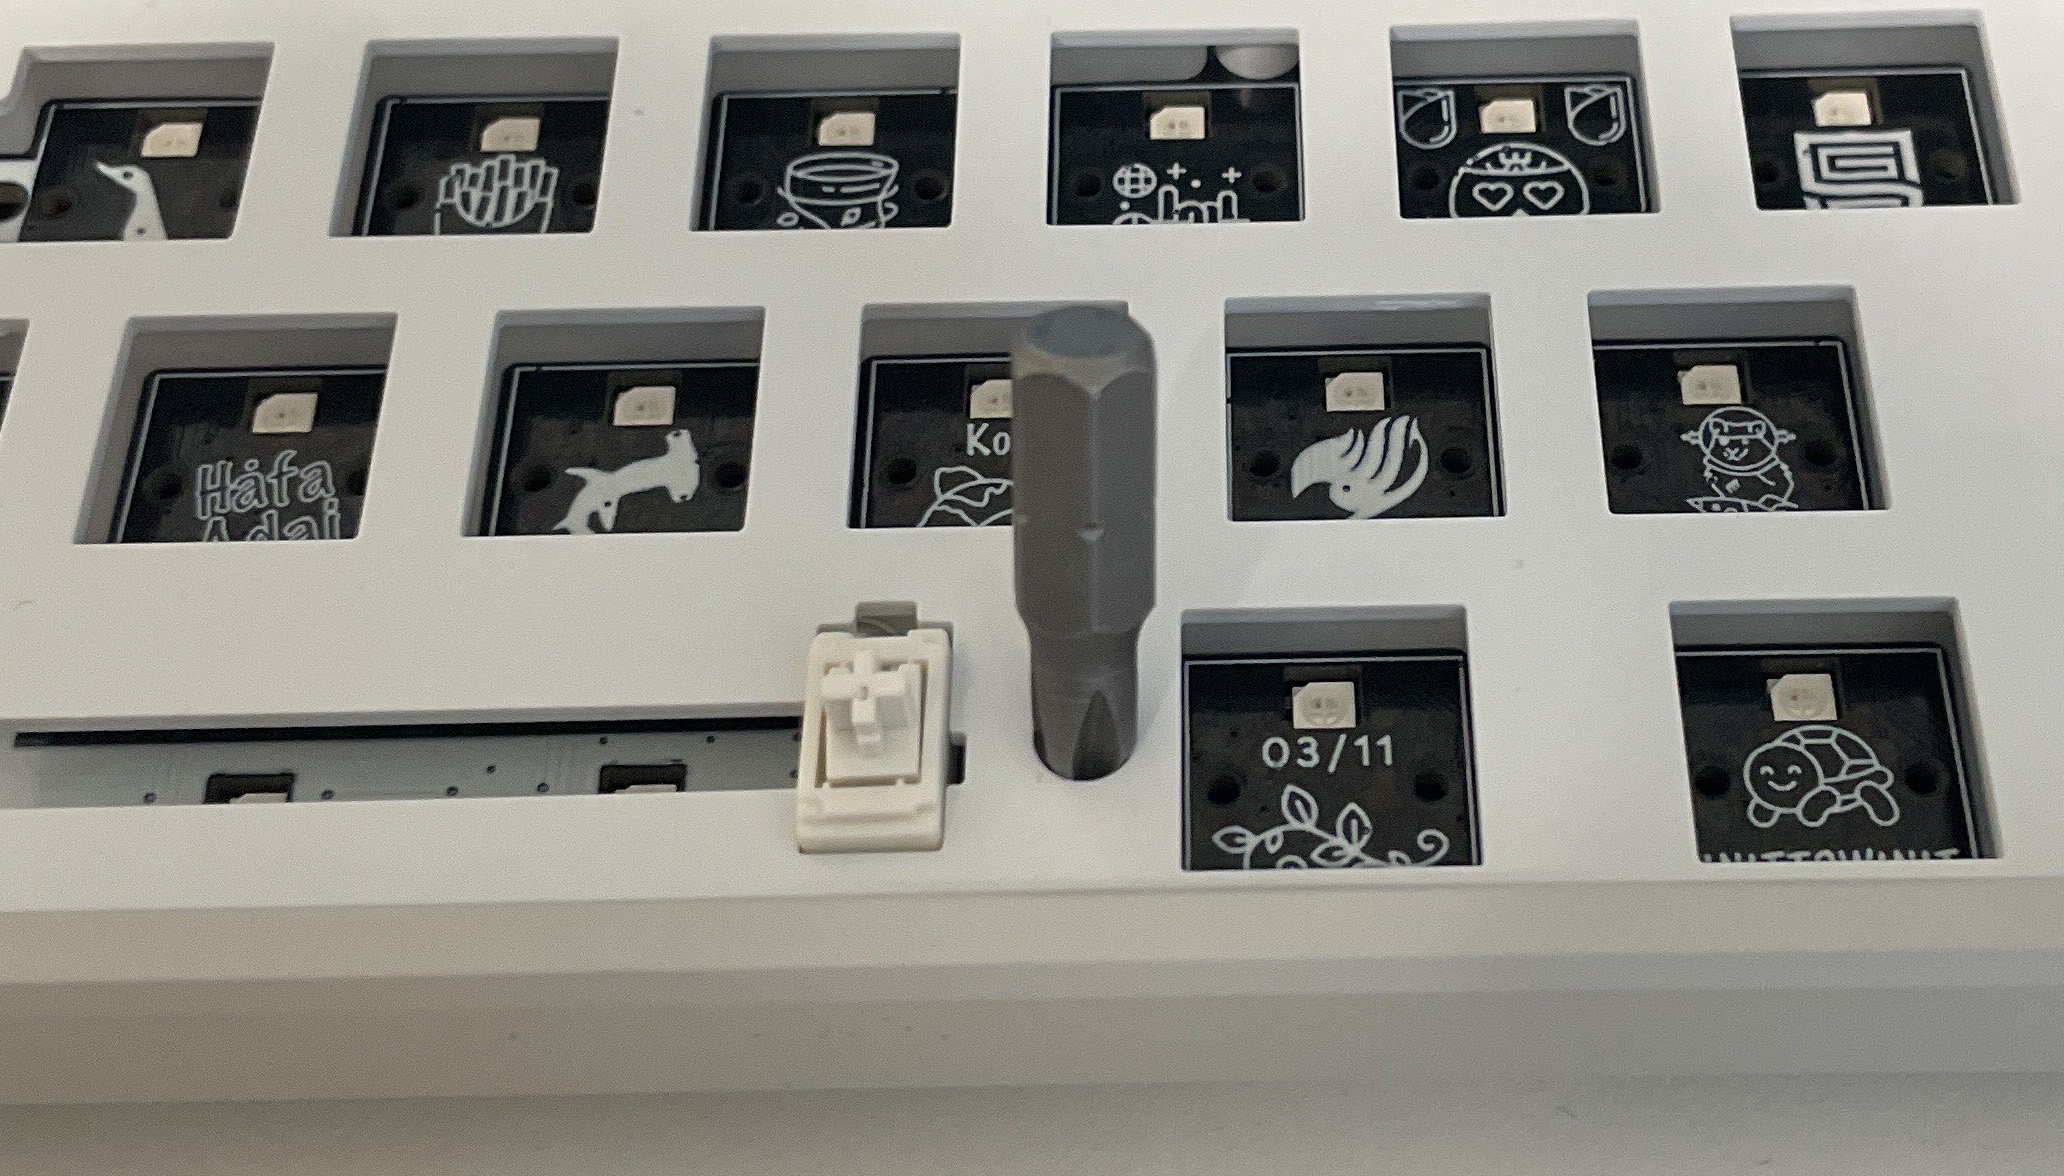
Installing the switches
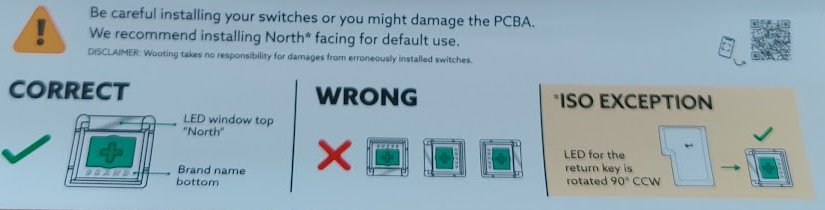
First thing you'll need to do is install all of your switches. Follow the alignment instructions as shown on the installation guide.
If you are installing third part switches, the instructions will be the same.
Installing the module into a case
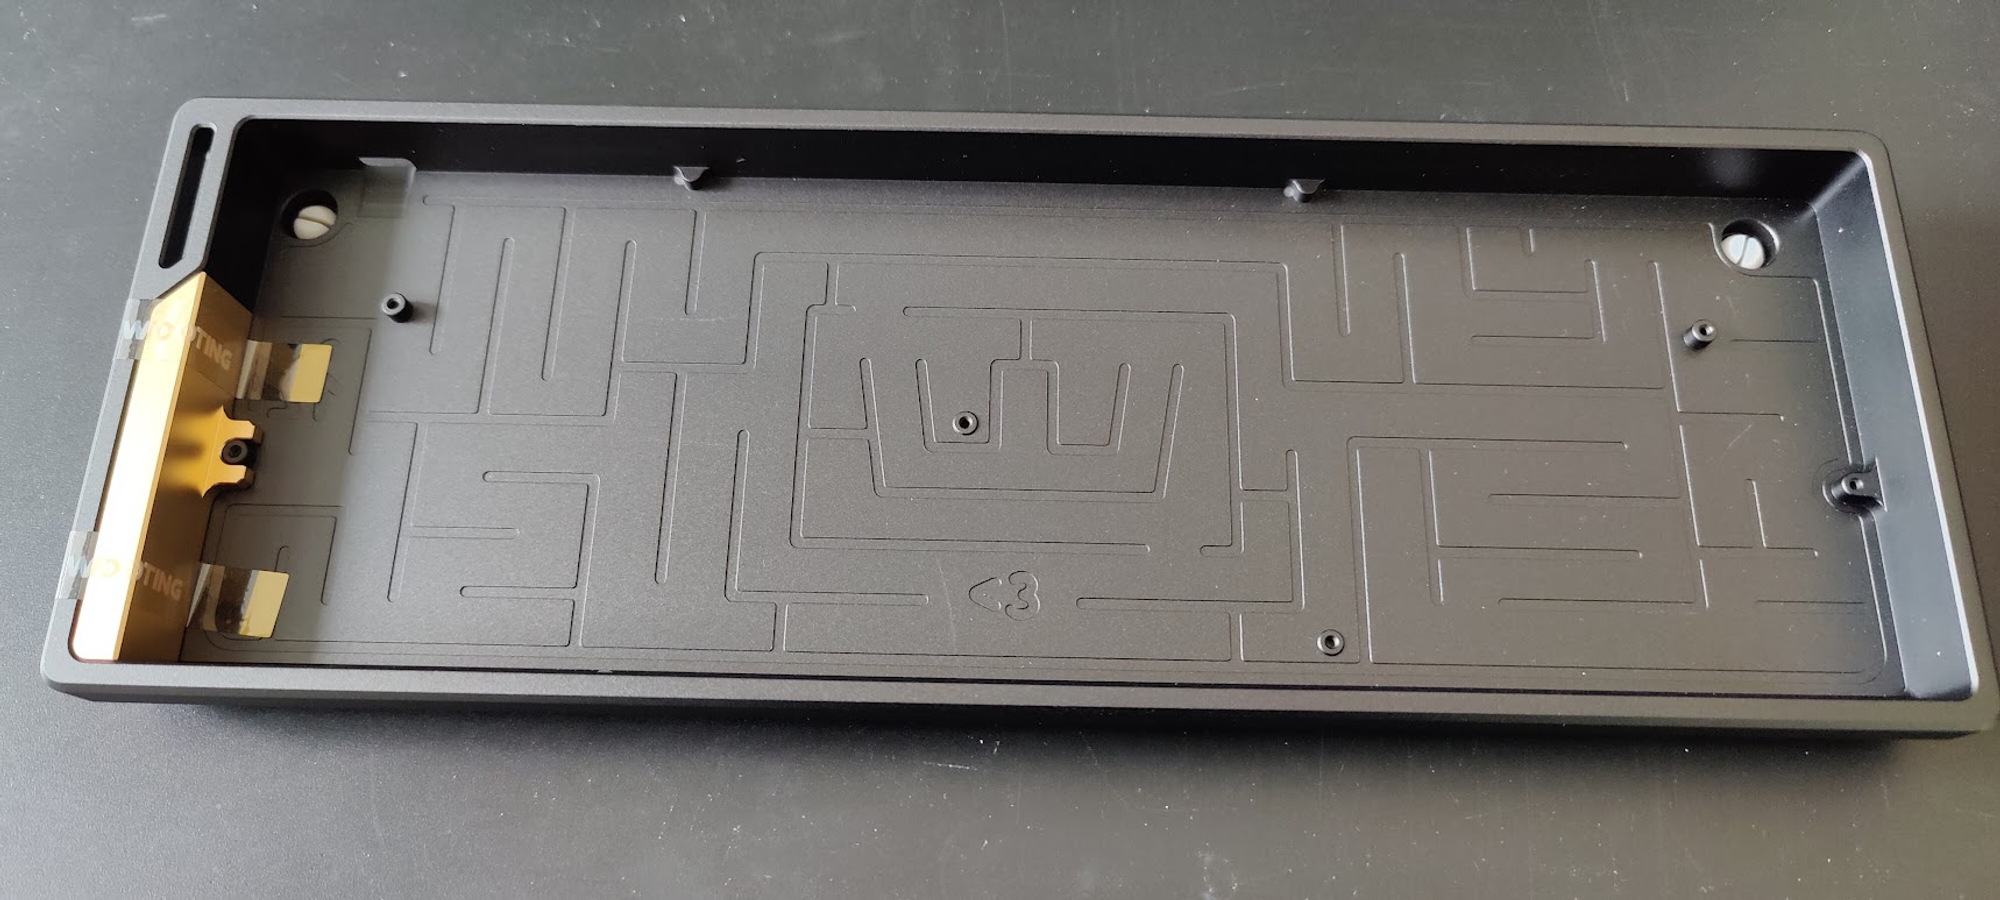
Now that your switches are all in, it's time to seat the module into your case and screw it in. For this example we'll use the Alumaze case, though any third part case should a have very similar approach.
Note: If you're using a third party case, please ensure it is compatible so as to not damage the module during installation. We have a community managed compatibility list you can refer to, or you can ask on our Discord server.
There are six standoffs in total, two of which are not preinstalled. Screw in these with your fingers carefully. The center one is not used for the 60HE, so you can leave that one out.
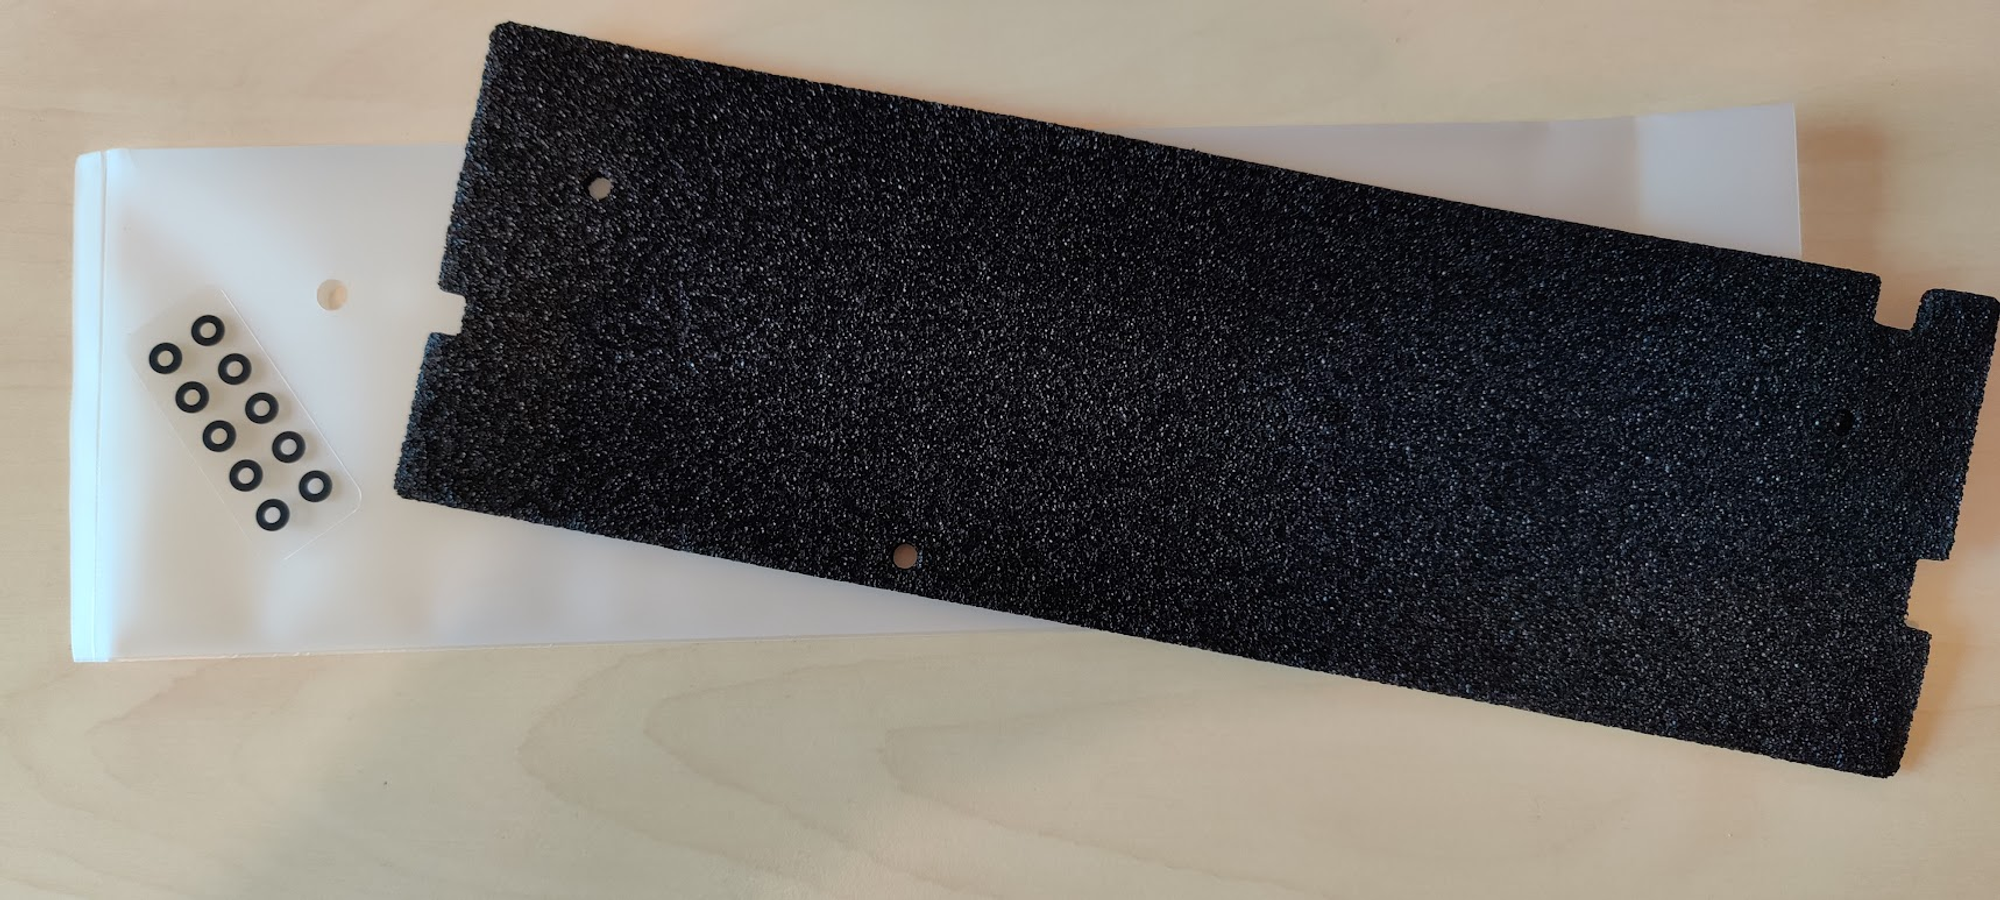
You can use the included piece of case foam to dampen the sound a smidge, as well as place the sheet of o-rings, one on each standoff.
The accent piece of the Alumaze is secured in place with a screw and an oring. Remove these before seating the Module into the case (use an oring from the sheet instead)

Carefully lower the module into the case at an angle, allowing the USB connector to slide in safely. Then grab a Philips PH1 screwdriver and install each of the white screws screw nice and slowly - When you feel resistance stop turning to avoid overtightening the screws.
Installing the keycaps
Now that the module is firmly installed into its case, it's time to install the keycaps. If you're installing one of our keycap sets, we recommend using the store page renders as guides on where all keycaps go.
Each language option has a render available as a visual aide.
https://wooting.io/product/wooting-double-shot-pbt-backlit-keycap-set-just-black
https://wooting.io/product/wooting-double-shot-backlit-pbt-keycap-set-just-white
https://wooting.io/product/wooting-etched-backlit-abs-keycap-set-black
If you're having difficulties getting the larger keycaps in, try to look at it from the side and line up the switch to the peghole on the keycap.

You should now be ready to plug in your Module for the first time. 🥳
Optional mods
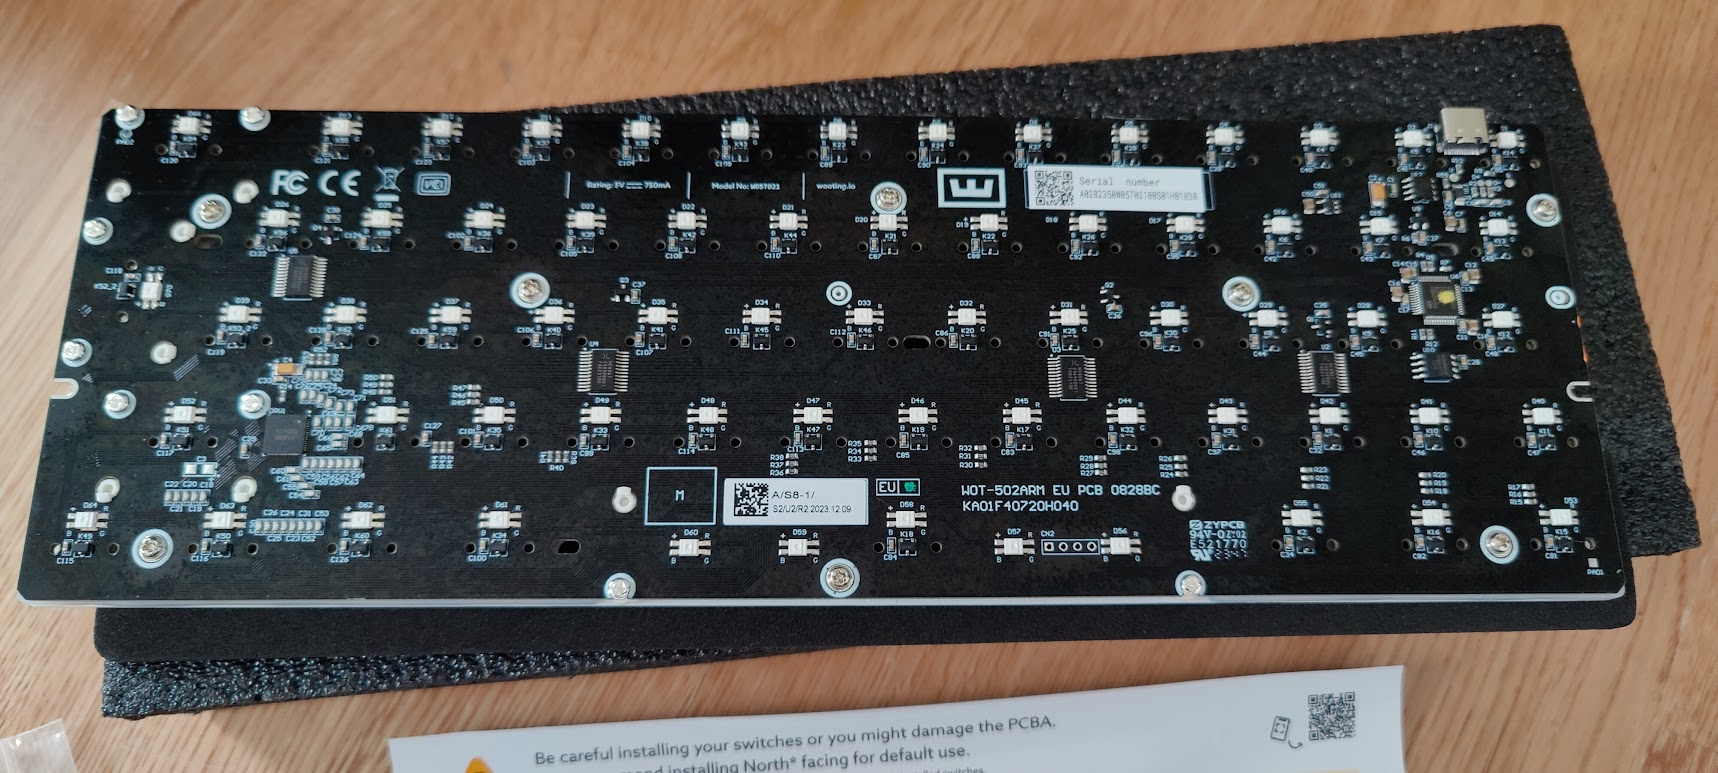
If you'd like to use the black foam instead of the silicone inlay, you'll first need to screw apart the module. You'll need a PH1 philips head screwdriver for this.
Flip over the module and screw out all of the screws carefully - You can leave in the ones that the stabilizers use (except for spacebar) and the module will come apart in layers easily.
When swapping out the inlay, make sure you align it properly and ensure it is lies flat on the plate before screwing it back together.

When screwing everything back together ensure that the stabilizers are also flat, before tightening the screws - failing to do so could warp and damage the PC Plate.