My 80HE flashes or disconnects when I type
Before proceeding
This issue can also occur if the USB-C cable is loosely connected or if the USB-C connector is damaged.
We recommend testing with another USB-C cable first to confirm whether the cable is causing the problem before continuing with the rest of the guide.
What this guide is designed to address
If you have an 80HE and you are experiencing any of the following issues:
- Typing near the Caps Lock key can cause it to disconnect and reconnect
- Vibrations or movement of the keyboard may trigger the keyboard to disconnect and reconnect
- Key presses/releases may not register, causing stuck or temporarily unresponsive keys or keys staying detected as pressed
- You look at the 80HE funny, and it disconnects
What causes the issue
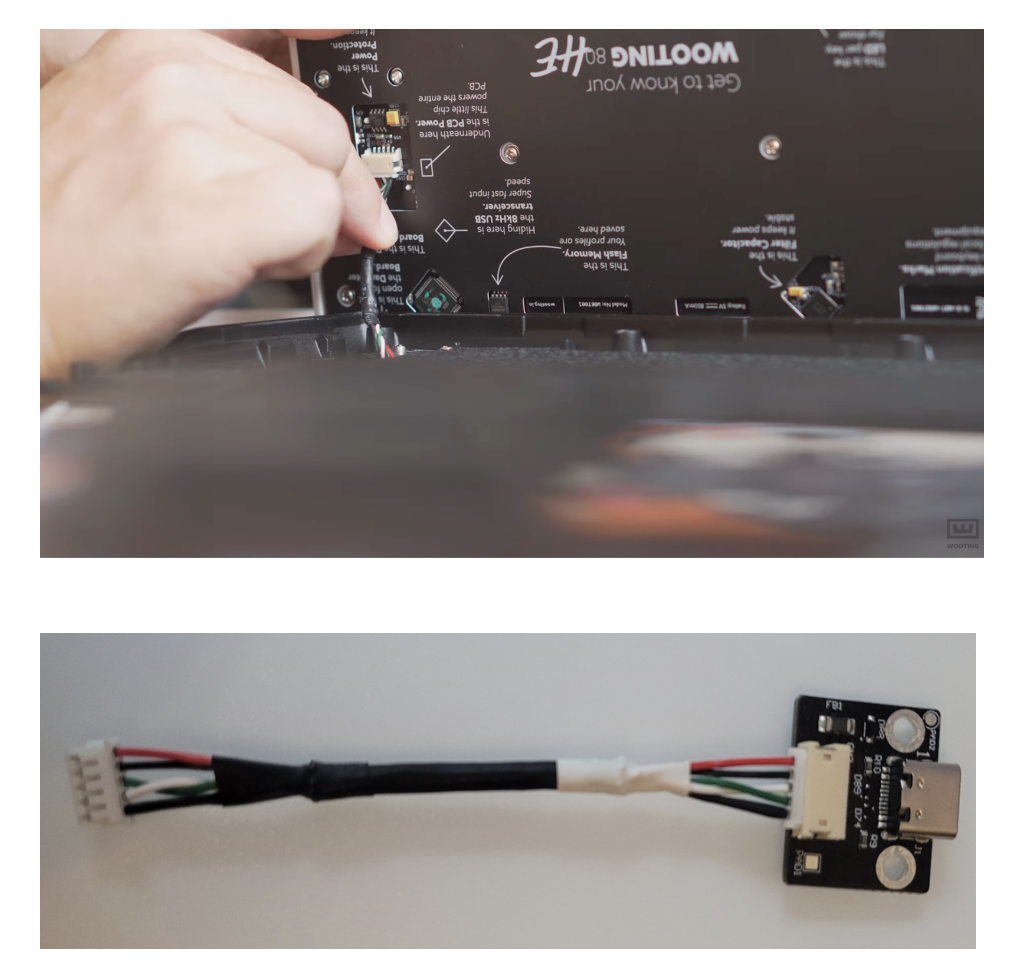
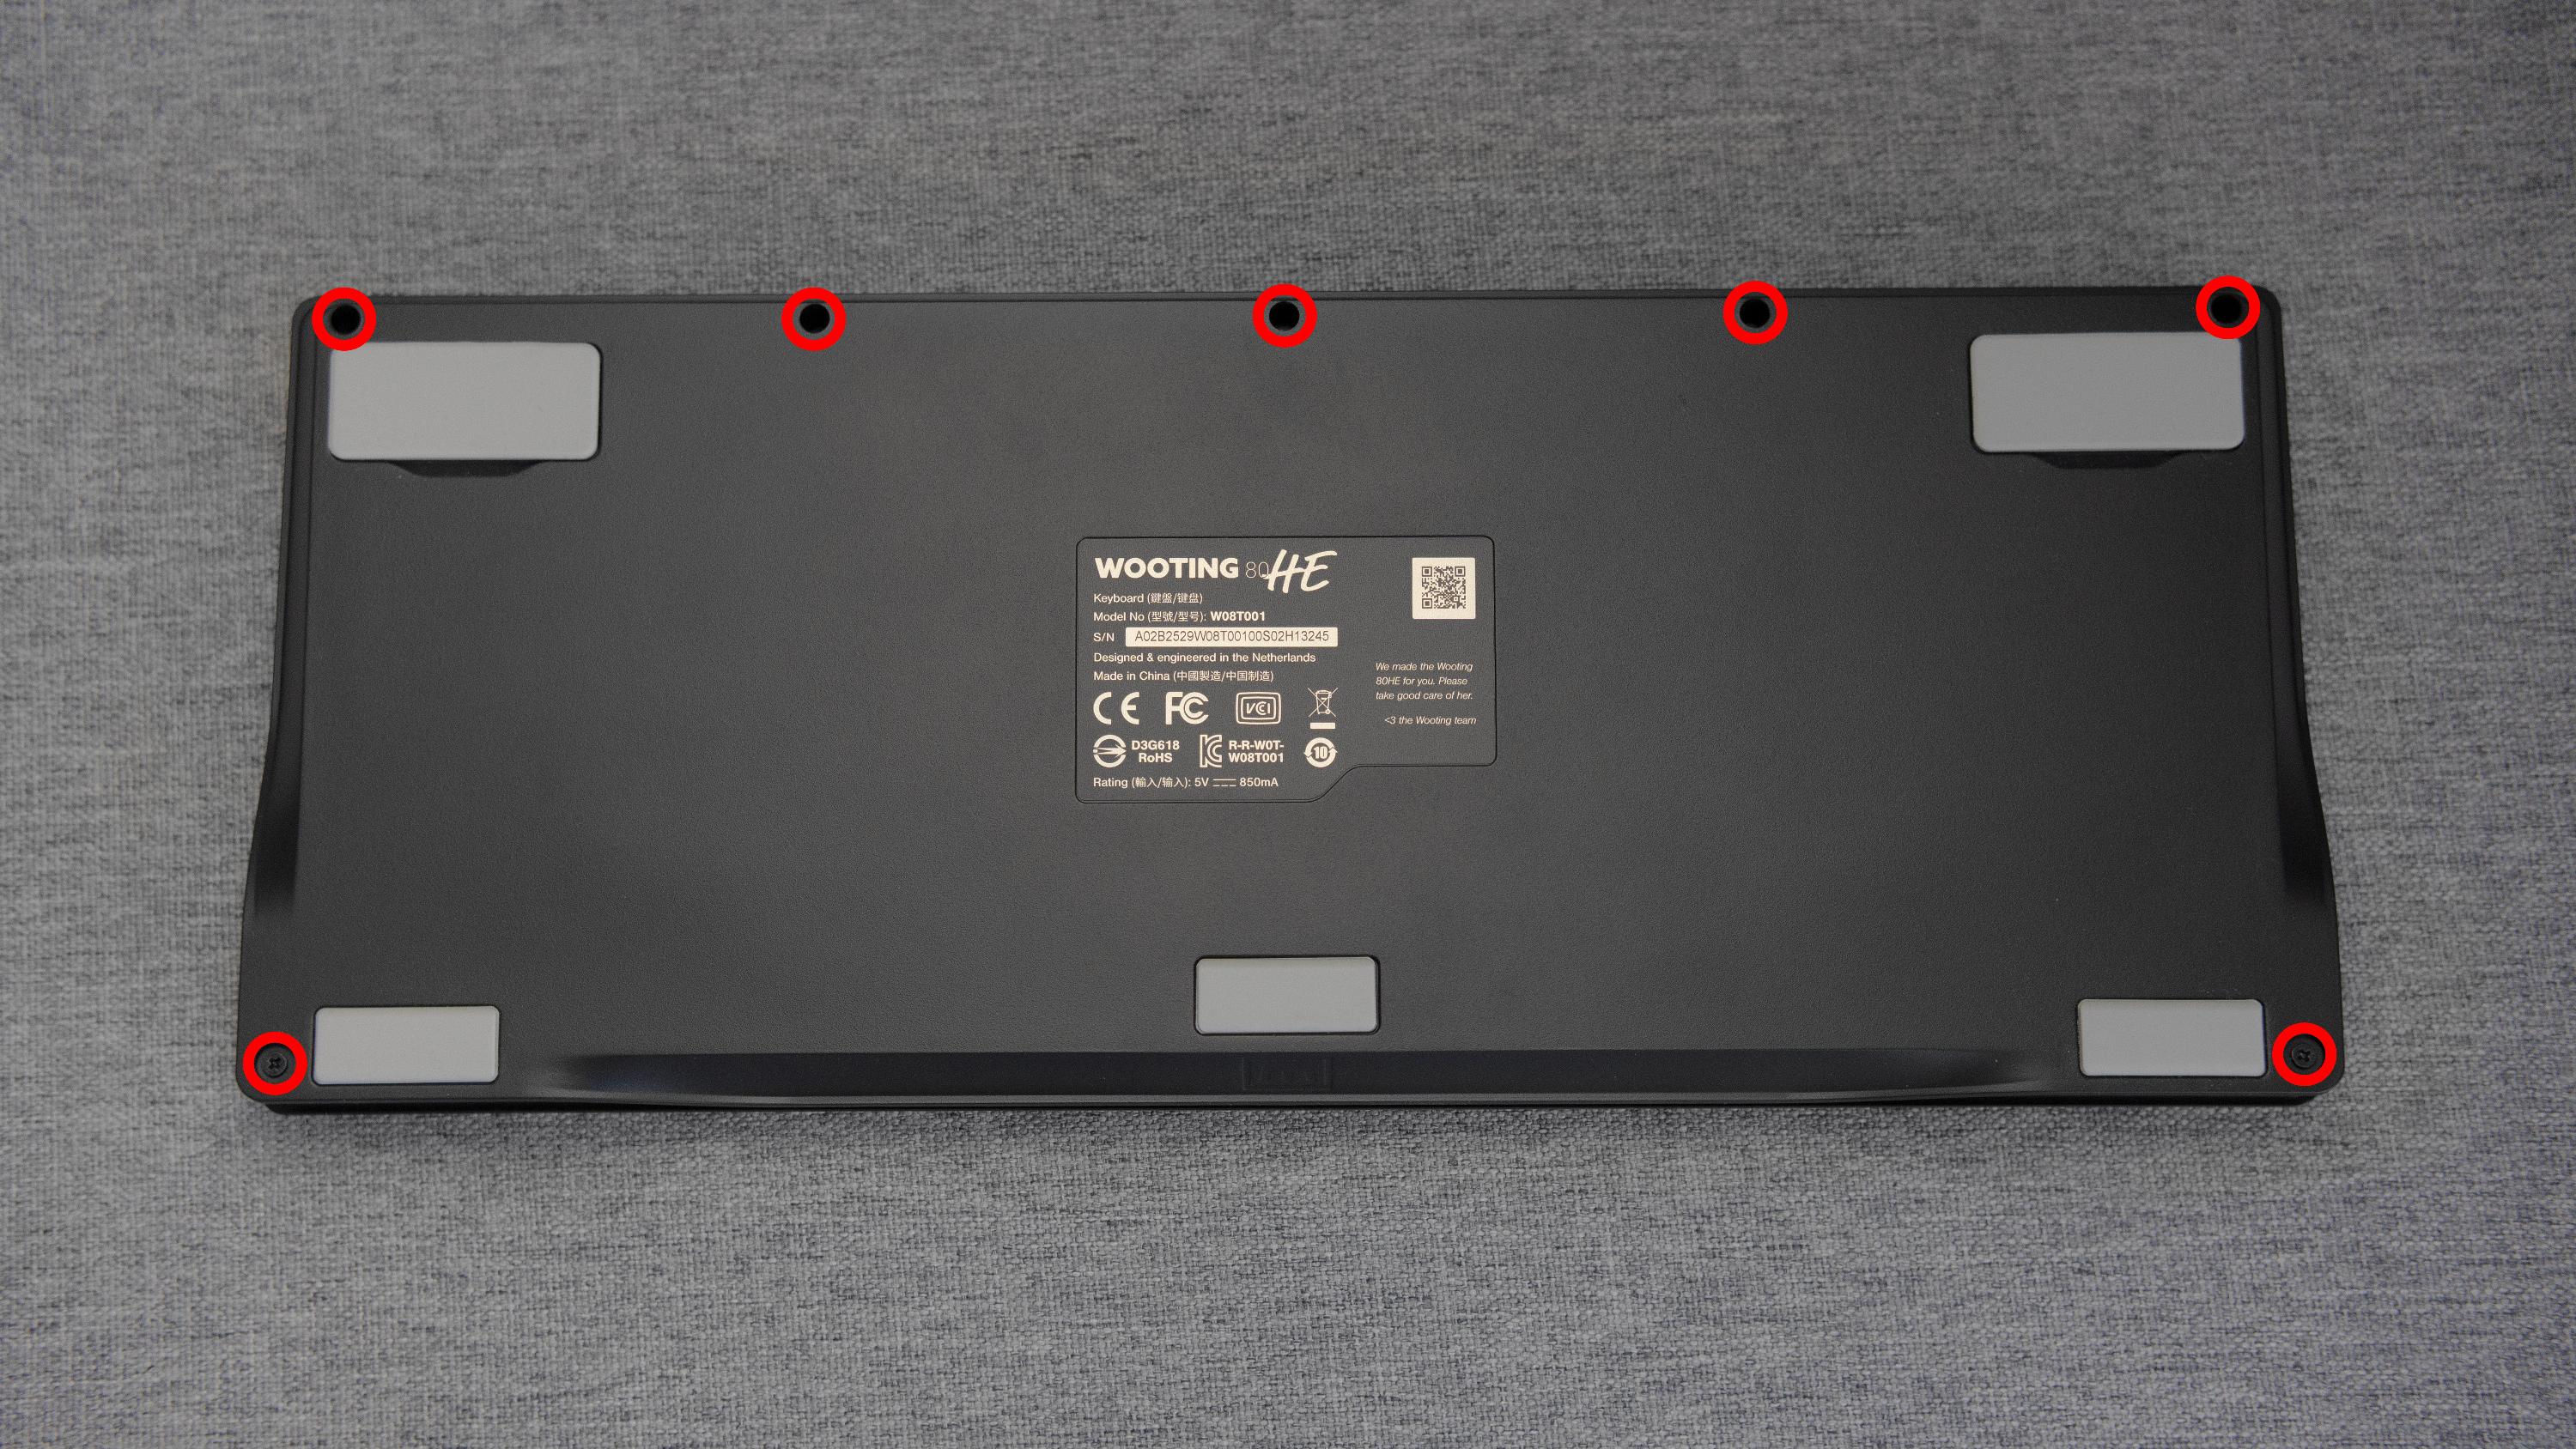
The 80HE has an internal cable called the "JST Cable." If this becomes loose from transit or vibrations, it can cause an unstable connection, leading to disconnections or missed data.
How to fix a loose JST cable
Use a PH1 screwdriver and follow the disassembly guide for your specific case to access the connector.
Once disassembled, firmly press the JST connectors at both ends.
Opening your PCR/Plastic case
-
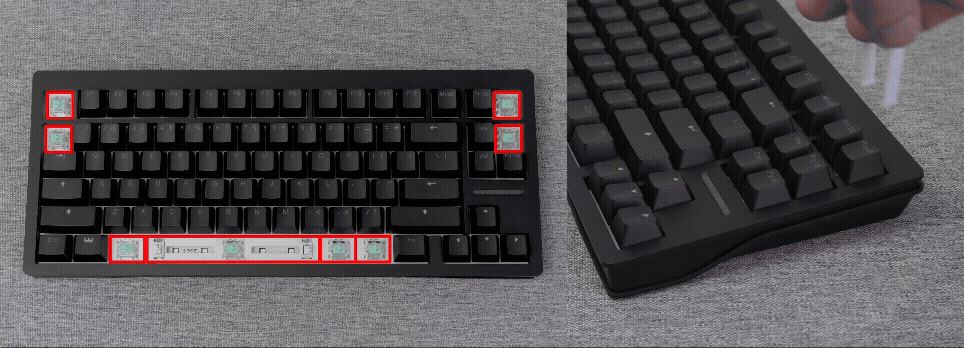
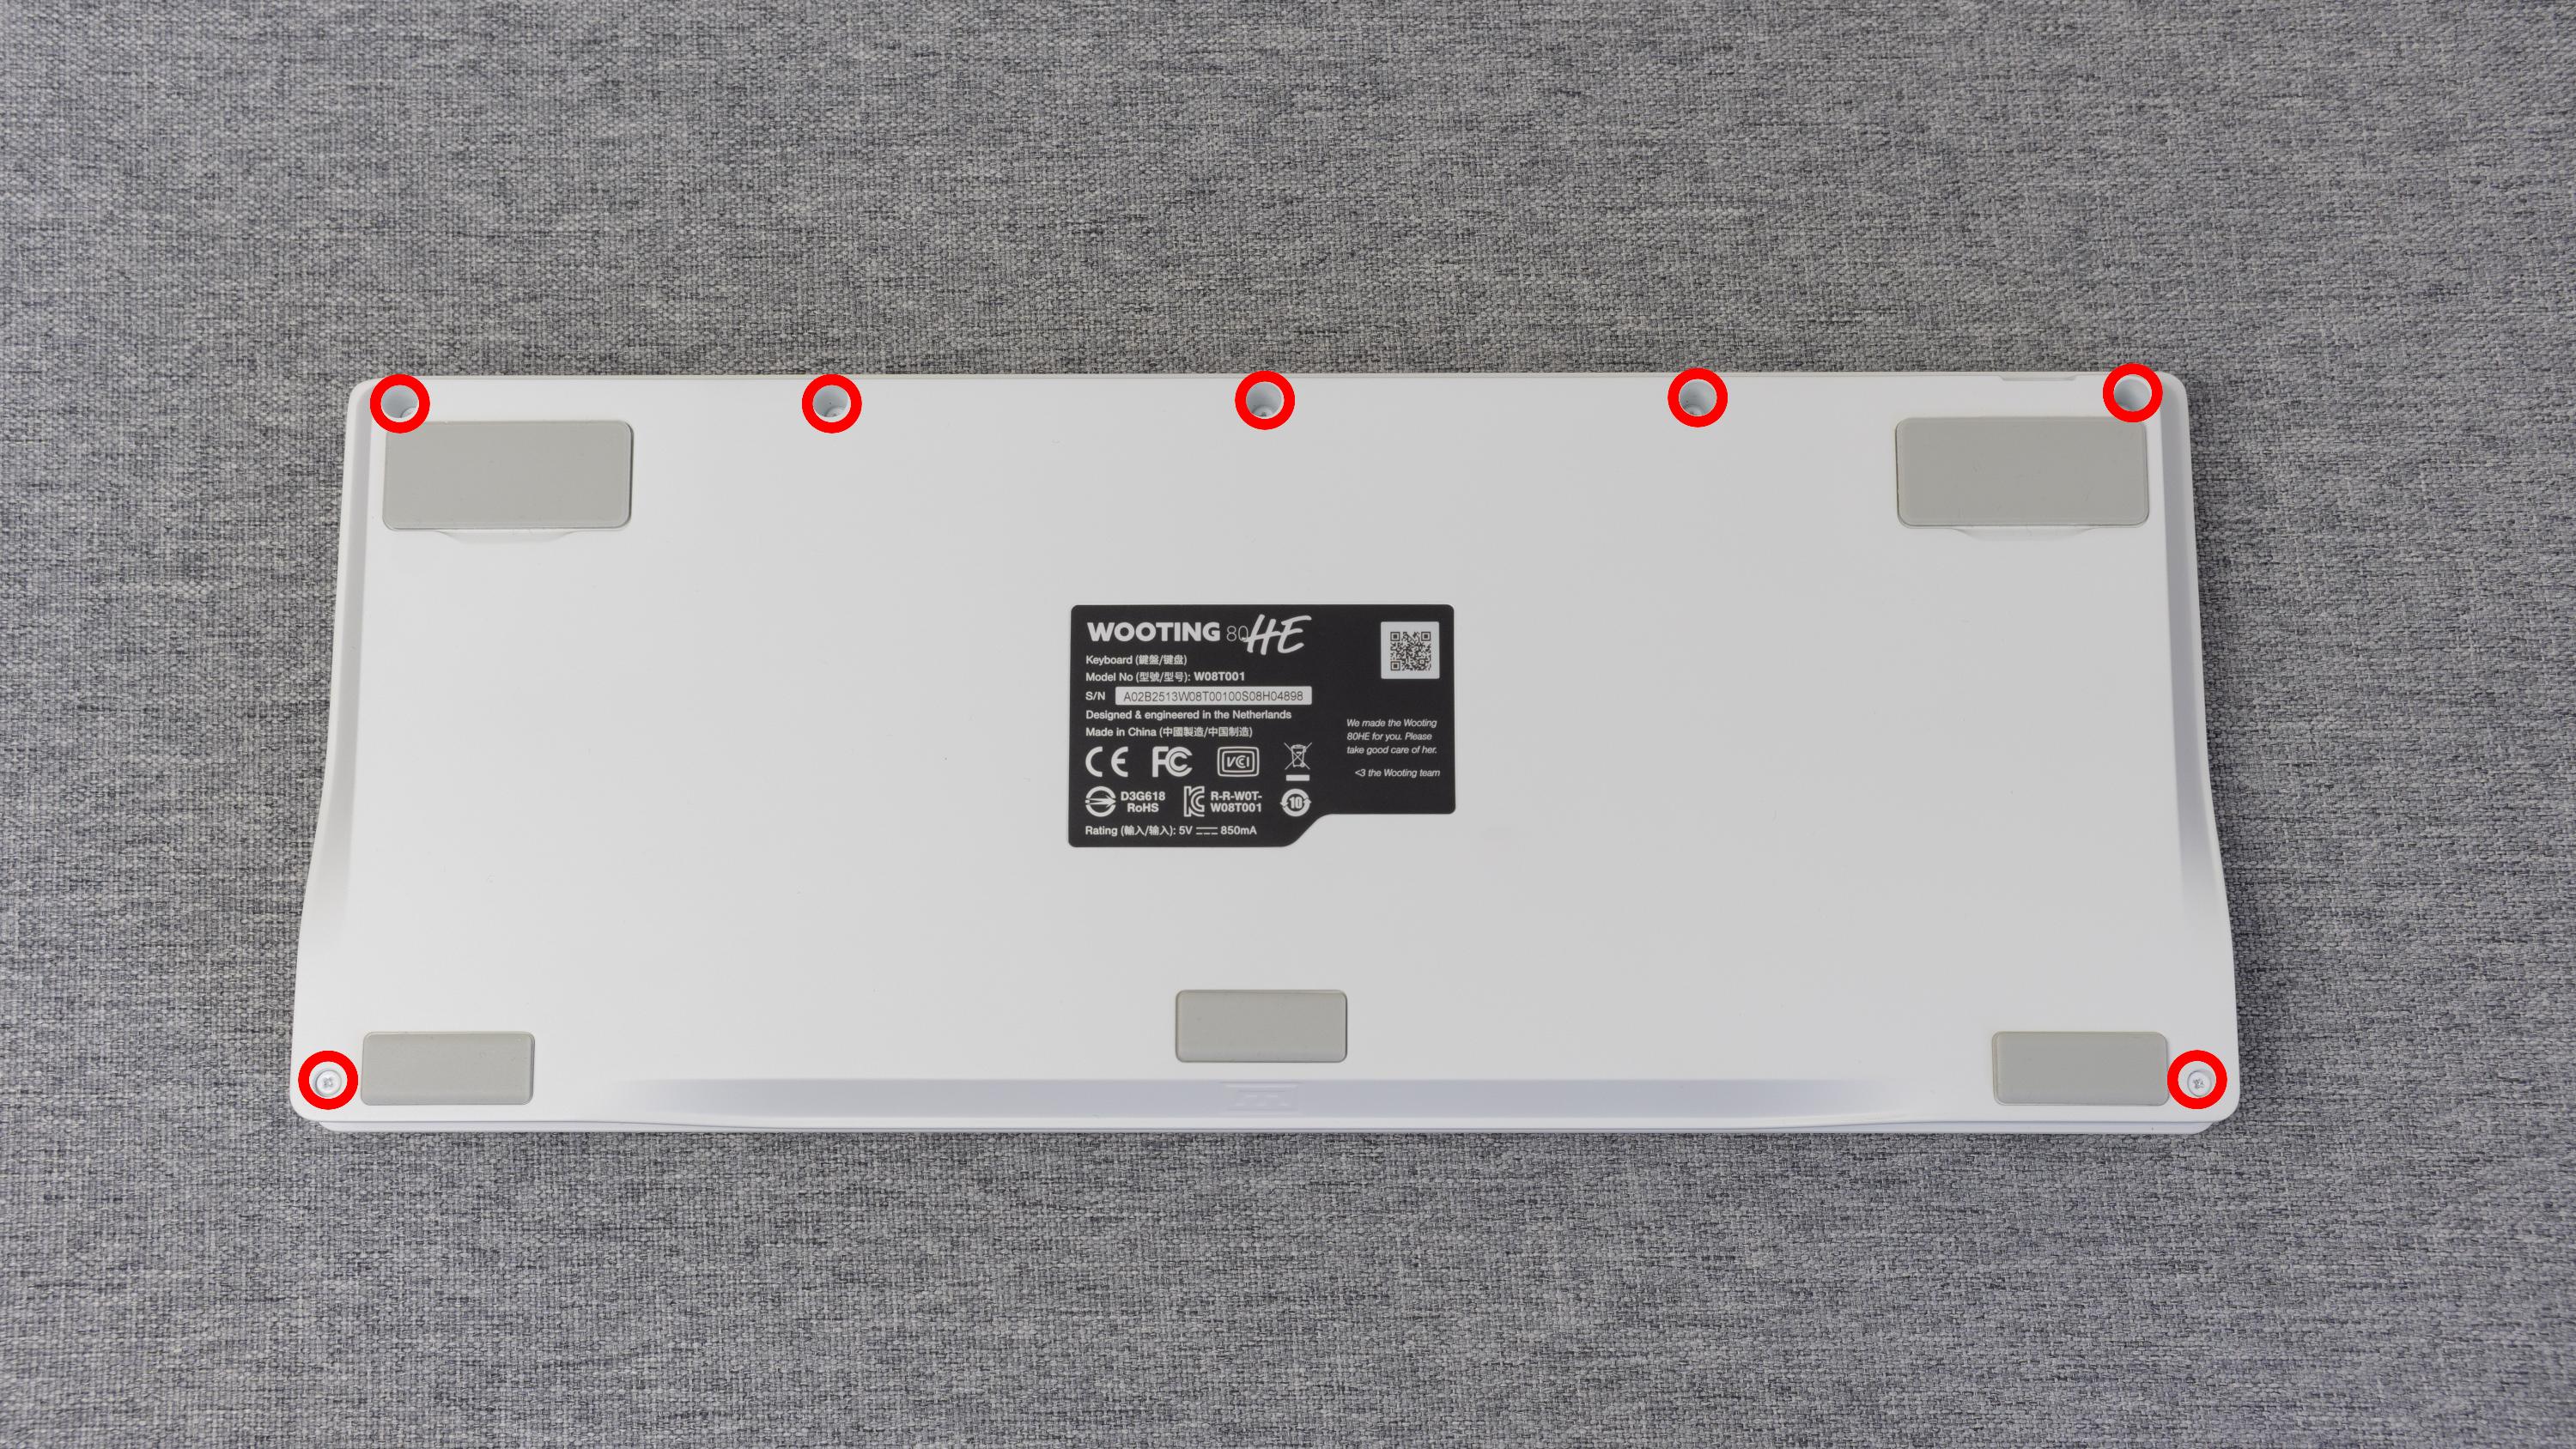
Flip the keyboard over, and remove the 7 case screws on the back.
Be sure to have something soft underneath your keyboard to avoid scratching the keycaps or case
-
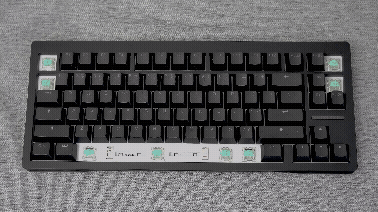
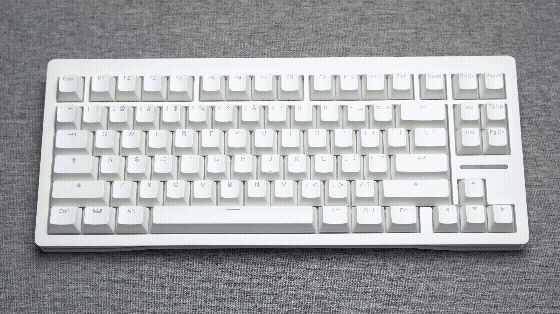
Removing the Keycaps
For the PCR or plastic case, you will need to remove the keycaps shown in the example below
-
Unclipping the top case
A. Flip the keyboard back over, release the clips at the top left and right using the motion shown in the video
B. Lift the top part of the case and remove the clips marked in the video below


Opening your Zinc/Metal case
-
Flip the keyboard over, remove the 7 case screws on the back
Be sure to have something soft underneath your keyboard to avoid scratching the keycaps or the top case dropping after unscrewing.
-
Unclipping the top case
A. Flip it back over while holding the case carefully to prevent the top case from falling off
B. Lift it at the top and push the top part forward to slide it off the hooks


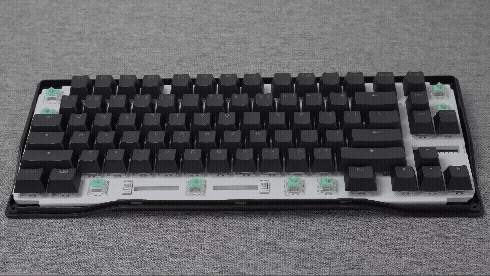
Lifting the Module from the case
-
Gently lift the module from the front until the JST cable is visible and accessible
-
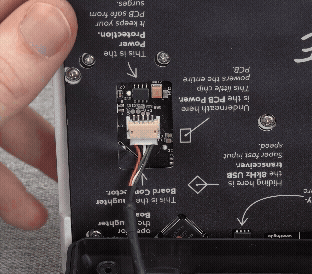
Plug the JST cable back in and press it in firmly using your nails
Do this for both ends of the JST connector.


Final check
Before performing a full reassembly of the keyboard, lower the module into the case and plug in the keyboard.
Then, perform the tests below to check if the JST cable is securely plugged in.
Once you have tested it and everything is working without issues, reassemble the keyboard.
Loose JST cable tests
-
Daughterboard | JST cable connection Test.
Gently move the USB-C cable near the USB-C port and see if you can cause the keyboard to react negatively.
-
80HE module | JST cable connection test.
Gently move the USB-C cable near the USB-C port and see if you can replicate the issue.